
 |
| One finished 1600 quilt. |
Watch this video on YouTube that shows fun example of a Jelly Roll 1600 race.
 |
| Jelly Roll 1600 workshop/race I participated in. We're the last to arrive of course, so we are in the back of this room. |
 |
| One strip of 1600 inches of fabric sewn together. |
Carolyn Goins, a local quilt instructor, hosted one of these 1600 workshops. This event was held in a windowless room in the basement of a building. The funny part was that as soon as we started sewing, the power went out and we were in complete darkness. It wasn't our fault - It was from a nearby utility transformer - so the whole local vicinity was without electricity. Thank goodness for smart phones with flashlight apps! Power came on about 30 minutes later, then we were good to go.
 |
| Kathleen & I sewing our Jelly Roll 1600. I can't sew with shoes on. Can you? |
You can read Carolyn's blog post about this event here.
Last month, I used my Sweet 16 to practice an all-over stipple to quilt it.
 |
| Stitching binding to back of quilt. |
Last night, I tried machine sewing the binding with my walking foot. First the binding is stitched to the back of the quilt, then folded over the edge, and secured down on the front side of the quilt. This, being my first time was a learning experience. I used clear thread so the stitching would not stand out. I'm glad I was able to try it out on this charity quilt first. I rushed through this job as it was late and I was tired. Next time I'll need to take it slower.
 |
| Close-up of front of quilt. Machine stitched. |
 |
| Close-up of back of quilt. Shows where machine stitched from front. |


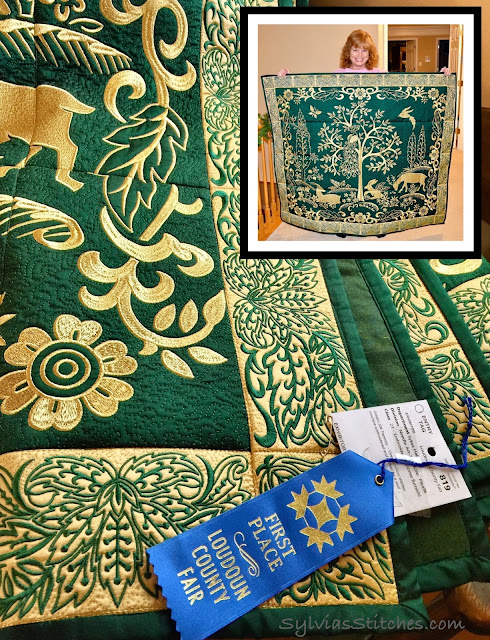


Your finished quilt is gorgeous. I love how all the colours work together. No I can't use a sewing machine with shoes on, it just doesn't feel right. Have a lovely weekend.
ReplyDeleteAli x
Thanks Ali. Enjoy your week!
DeleteThat looks like so much fun! I never sew with shoes on either and I also work the pedal with my left foot. (I am not left handed though). I am a fan of machine minding, but I sew on the front then press to the back and stitch in the ditch on the front and catch he binding.
ReplyDeleteHi Carolyn,
DeleteI'll have to try your method of machine stitching the binding to the back. Anything beats hand stitching it in my book. :-) Thanks for stopping by!
Beautiful quilt and what a wonderful cause! your binding looks beautiful! Thanks for sharing.
ReplyDeleteFreemotion by the River Linky Party Tuesday
Thank you Connie.
DeleteIt's extra fun to quilt when the fabric is paid for by someone else!! I enjoyed making one of these quilt tops, also.
ReplyDeleteI agree Mrs. Hearts. Thank you for stopping by!
DeleteWhat a fun time. Thank you for sharing this!
ReplyDeleteThank Carla. Definitely recommend this event. It is a lot of fun.
Delete